We have had a cozy coupe in the family for quite a while. In fact, this thing has to be at least 7 years old. With all of the kids getting older, it was handed down to Addy for her new car. Thanks to Pinterest, I started to see some awesome little cozy coupe re-do’s. A bat mobile, an oscar meyer weiner machine, and then this Minnie Mouse coupe re do just really caught my eye!
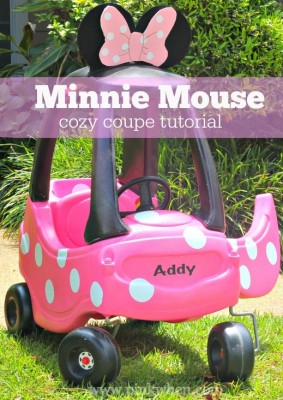
Minnie Mouse Coupe Tutorial
I couldn’t help it, I had to do it! So here is a quick tutorial on how I made this old coupe a new coupe! (Check out our new Minnie Mouse Backpack we made to go with the coupe!)
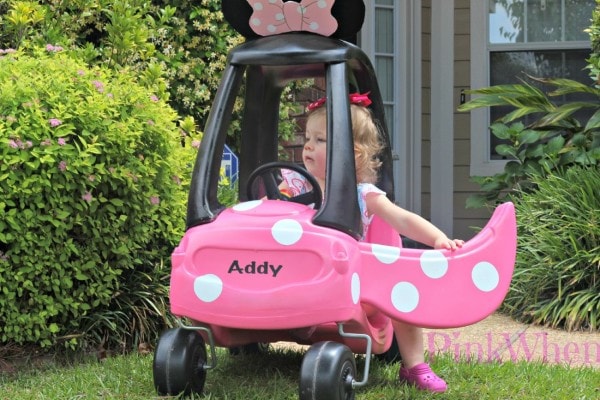
We have had a cozy coupe for about 7 years now. It was time to either trash it or to make something new with it.
Thanks to Pinterest, I found some awesome little cozy coupe redo’s.
A batmobile, an Oscar Meyer Weiner machine, and then this Minnie Mouse coupe redo just really caught my eye! I couldn’t help it, I had to do it!
So here is a quick tutorial on how I made this old coupe a new coupe! (Check out our new Minnie Mouse Backpack we made to go with the coupe!)

Minnie Mouse Coupe
First I started with this coupe, and I gave it a thorough scrubbing.

The original Cozy Coupe
After you have your Cozy Coupe scrubbed clean, it’s time to disassemble this little car.

Disassemble to Cozy Coupe
The next thing you want to do is cover your wheels with plastic. Then you are ready to get your Primer out. You will want to Prime first to make sure your colors adhere well.

Cozy Coupe Primed
After your primer has dried, it’s time to paint your Cozy Coupe pieces. I used Valspar paint for plastic with this car.

Painted Pieces
Once your paint dries, it’s time to put your cozy coupe back together and get ready to decorate. I don’t have a picture of this together that isn’t fuzzy, but it is basically the cozy coupe with pink and black rather than yellow and red.
After this was together, I went ahead and broke out the Silhouette Cameo and made her dots and name. I wanted to personalize it, but also like that when she hands this down to one of her little friends, we can personalize it for them as well.

Painted with dots
Minnie Mouse Coupe Tutorial
Next up was to make the ears. I spray painted these little disks (I picked up from Michaels for $1) black, and then grabbed some black adhesive felt. Since I used such thin disks, I wanted something to help them look like fuzzy ears, and also help them stick up. The sticky felt worked out well.

Disks for ears
I attached the felt ears, made the bow, and we were ready to go!
For the bow, I used a foam board. It was easy to cut, and I added some smaller white dots I made with the Silhouette machine. Attached this to the ears, and we were all done!

Addy was so excited when she saw her new car!

Addy with her new Minnie Mouse Cozy Coupe
It didn’t take long for her to invite a passenger to ride with her. Sorry Felix, this Coupe is for ONE.

Minnie Mouse Cozy Coupe Re-do
Thanks for stopping in to PinkWhen! You can follow me on Pinterest by clicking here!






LOVE IT!! What are the disks that you made the ears out of called? What are they made of and what are they close to in Michaels. I am thinking about doing this and would love to try what you used.
Hi Brenda! I made the ears out of little wooden round disks, and I am not sure what they are called. They are back in the unfinished wood section…but to be honest, the humidity has made those ears flop. I would try doing a larger piece of wood and then securing that directly to the top with a couple of screws. The sticky felt and small disks just couldn’t handle the humid heat here in Louisiana.
I wanted to what you used to attach the ears
I used gorilla glue, but if I had it to do all over again, I would use epoxy so I KNOW it won’t go anywhere next time.
I cannot wait to make this for my little girl! Thank you for the directions and materials.
How did you make the white circles on the car?
I used sticky vinyl and cut circles out with a vinyl cutting machine. You can probably find a circle pattern and just hand cut the circles from vinyl as well.
What size are the white circles on the coupe?
They are just about 4.5″ I believe.
Did you put polyurethane on the car after you finished painting it?
No I did not.
What size are the wooden discs.
What were the measurement of the bow? were did you get it?
I actually made it from foam board. I just free hand cut it to have it look like a bow.
Sooooooooo cute ……can hardly wait to create this for my grand daughter
How many cans of spray paint did you use total?
I purchased two pink and two black and used every bit of the pink, but I did have black leftover.
Now that it has been awhile has the paint held up …..I painted one and already as I put the door on some paint chipped off …..would polyurethane help
I have had some paint chip off on my door as well. I am not sure, but polyurethane might help.
How did u attach the ears to the car??
Hi. I love this little car, well done. I’m planning on making one for my granddaughter but unsure how to get the ears to stay on top. Could you please tell me how you attached the ears.
Thank you
Elaine
Hi Elaine! I would recommend using a high grade glue like an E6000. They won’t go anywhere after that! Also, you may want to reinforce the ears a little as well. I would recommend a thicker foam board, or just doubling the foam board. It’s a cute and fun project! Share a photo with us when you are all finished with it!
Hi there!
What an awesome project! How did you take apart the roof? I can’t seem to take the left and right sides off. Do you have a trick?
There wasn’t a trick! It just snapped right off. Our cozy coupe (from today’s date) is probably 13 years old, so the coupes may be different from today’s cozy coupe design. Sorry I can’t be of more help!