• Start Here
    • Recipe Index
      • Instant Pot Recipes
      • Air Fryer Recipes
      • Soups & Chilis
      • Desserts
      • Ingredients
        • Beef
        • Chicken
        • Pork
        • Seafood
        • Vegetables
      • Meals
        • Appetizers
        • Breakfast
        • Dinner
        • Lunch
        • Side Dish
      • Popular
        • 30 Minute Meals
        • Casseroles
        • Simple Fit Forty
        • Slow Cooker Meals
        • Soups & Chili
        • 30 Minute Meals
        • Weekly Meal Plan
        • Crafts & DIY
          • How to Use Essential Oils
          • Essential Oil Uses
          • Silhouette Crafts
          • DIY Furniture
          • Knitting and Sewing Projects
          • DIY Gift Ideas
          • Free Printables
          • Holiday Crafts
          • No Sew Projects
  • Air Fryer Recipes
  • Slow Cooker Meals
  • Instant Pot Recipes
  • Desserts
  • Nav Social Menu

    • Facebook
    • Instagram
    • Pinterest
    • Twitter
    • YouTube
Header logo for homepage

PinkWhen

Easy Recipes for Everyone

DIY Gold Glitter Hello Sign

Home » Crafts & DIY » DIY Gold Glitter Hello Sign

Published August 26, 2015 by Jennifer. 2 Comments.
This post may contain affiliate links. Your cost is the same but it helps support this site and the fun freebies we share. See our full disclosures here.

Share
Pin
Share
Share

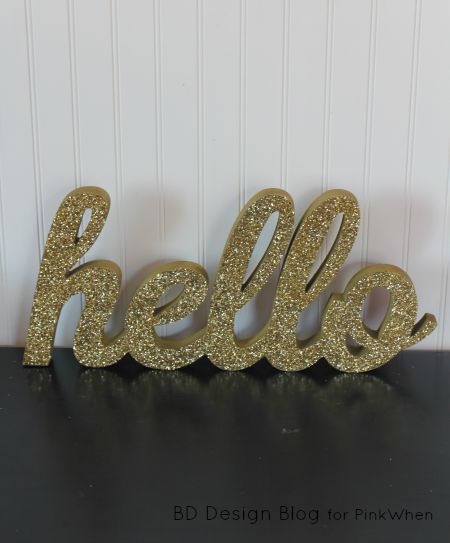
Hi PinkWhen readers. It’s Brandy from BD Design Blog and I’m excited to be here today! Have you ever had a piece of artwork that you loved but was a little blah or outdated? Don’t give up on it just yet. I’m a firm believer in that there isn’t anything a little paint and glitter can’t make fantastic again! Gold paint and gold glitter no less :)DIY Gold Glitter Hello Sign.

DIY Gold Glitter Hello Sign

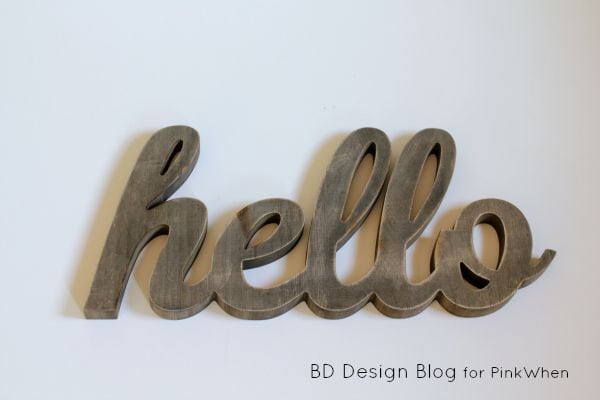
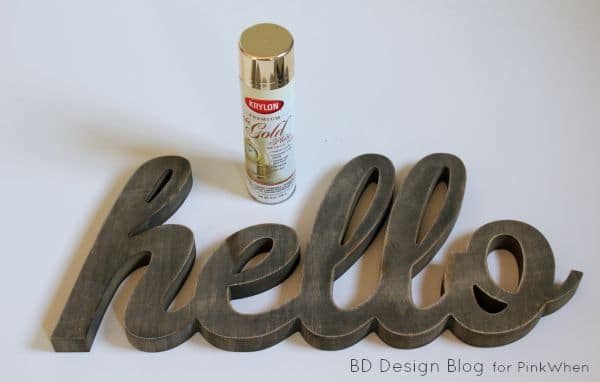
Here’s what you will need for this little project:

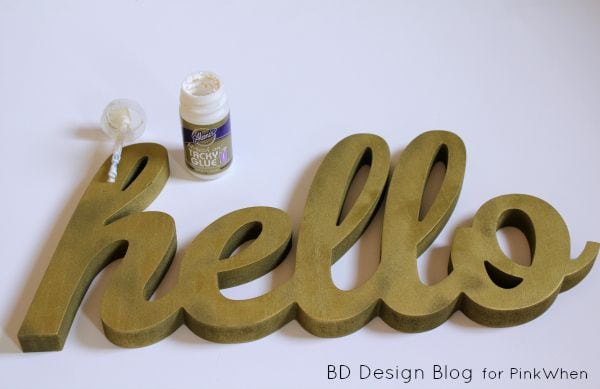
– a piece of artwork that spells a word
– a bottle of gold metallic spray paint
– medium coarse gold glitter
– modge podge or Elmer’s glue
– glitter sealer

1. Take your piece of artwork and give a good cleaning.
 DIY Gold Glitter Hello Sign
DIY Gold Glitter Hello Sign

2. Then take your bottle of spray paint and spray the entire piece. Let it dry for a few hours. I had to do several coats of paint to evenly cover all the grooves.
DIY Gold Glitter Hello Sign

3. Once it’s dry take a paint brush (or your finger) and spread the glue evenly on just the top part.

DIY Gold Glitter Hello Sign

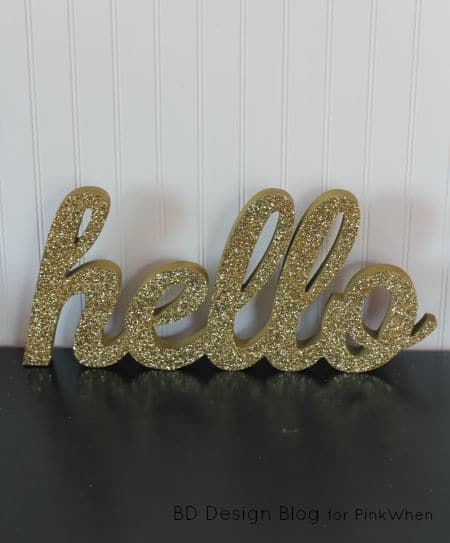
4. Here comes my favorite part: sprinkle the glitter until your heart is content! Cover with glitter until you can’t see any more glue. Give it a little pat to make the glitter stick and then turn it over and give it a little shake to get the access glitter off.

DIY Gold Glitter Hello Sign

5. Now for the most important part…seal the glitter. Why do all this work just to have your glitter flake off and make a mess on the floor. All it needs is a fine layer of sealer sprayed on top for it to last forever!

I hope this inspires you to redo a piece of artwork and give it a little glittery update like I did with this DIY Gold Glitter Hello Sign.

DIY Gold Glitter Hello Sign

Share
Pin
Share
Share

August 26, 2015 · 2 Comments

MORE FROM PINKWHEN!

Delicious Chicken and Dressing Recipe | PinkWhen
How to Make a Delicious Chicken and Dressing Recipe
DIY Face Mask Tutorial
T Shirt Face Mask Tutorial
Homemade Disinfecting Wipes in a glass jar.
Homemade Disinfecting Wipes – Great for Cleaning

ABOUT JENNIFER

about me

Do you feel like there is not enough time in the day? I'm with you. Hi! I'm Jen, a wife, mother, and tennis lover who likes to share all of my quick easy recipes, crafts, and more. You can find anything from delicious 30-minute dinners or scrumptious dessert recipes the whole family will love. Read more...

Previous Post: « Crochet Star Flower Lights
Next Post: Slow Cooker Asian Beef and Ramen Bowls »

Primary Sidebar

Welcome!

about holly

Do you feel like there is not enough time in the day? I'm with you. Hi! I'm Jen, a wife, mother, and tennis lover who likes to share all of my quick easy recipes. Wondering why my site is called PinkWhen? Click in the top left corner START HERE to read more about it!

  • Facebook
  • Instagram
  • Pinterest
  • Twitter
  • YouTube

Search

Popular Posts

  • Delicious Chicken and Dressing Recipe | PinkWhen
    How to Make a Delicious Chicken and Dressing Recipe
  • Overhead shot of an easy summer pasta salad recipe ready to serve.
    Summer Pasta Salad
  • fully cooked and seasoned chicken breasts made from frozen in the air fryer.
    Frozen Chicken Breasts in the Air Fryer
  • Fully cooked frozen chicken pattie made in the air fryer and dressed on a bun.
    Frozen Chicken Patties in Air Fryer
  • Start Here
  • Air Fryer Recipes
  • Slow Cooker Meals
  • Instant Pot Recipes
  • Desserts

Footer

Popular

Homemade Lavender Lotion Bars

How to Make Homemade Lavender Lotion Bars

Tic Tac Toe Backyard Bean Bag Toss

Tic Tac Toe Backyard Bean Bag Toss

Glass Vase Makeover

Featured

Crawfish Pie sliced and ready to eat.

What to Serve with Jambalaya

Delicious Chicken and Dressing Recipe | PinkWhen

How to Make a Delicious Chicken and Dressing Recipe

Overhead photo of copycat KFC coleslaw with a serving spoon.

KFC Coleslaw Recipe

Latest

Overhead shot of an easy summer pasta salad recipe ready to serve.

Summer Pasta Salad

fully cooked and seasoned chicken breasts made from frozen in the air fryer.

Frozen Chicken Breasts in the Air Fryer

Fully cooked frozen chicken pattie made in the air fryer and dressed on a bun.

Frozen Chicken Patties in Air Fryer

Copyright © 2023 pinkwhen.com. All rights reserved. Privacy Policy. Cookie Policy.