Making a French Shabby Box is easy when you start with one of those empty tea gift boxes that are so popular at the holidays. Save money by making a gorgeous shabby-style piece for your home decor!
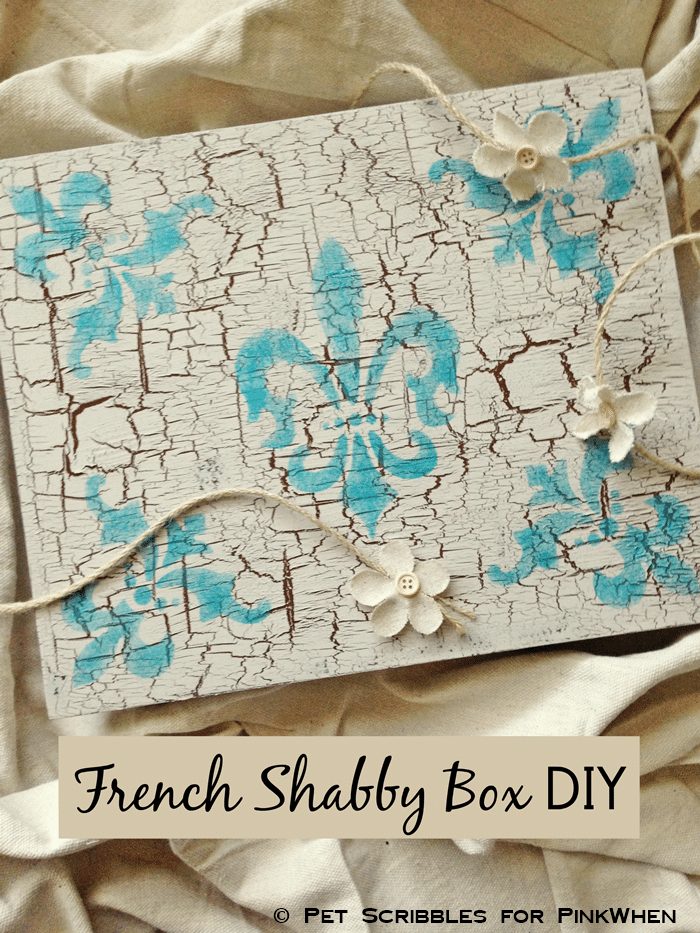
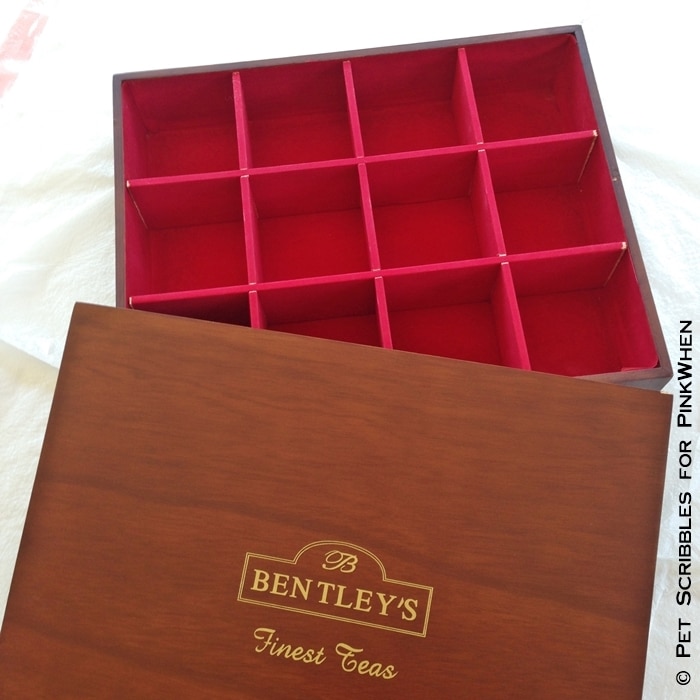
Hi everyone! Laura from Pet Scribbles here to show you the awesome idea I came up with to put those empty tea gift boxes to use: a French Shabby Box!
Yes, I receive at least one of these tea gift boxes every year around the holidays because I love tea. The boxes – both inside and out – can be very pretty if upcycled into something decorative!
French Shabby Box
Supplies:
- Empty recycled tea box
- Chalky finish paint in brown (Americana Decor – Rustic)
- Chalky finish paint in beige-grey (Americana Decor – Primitive)
- Chalky finish paint in teal (Americana Decor – Treasure)
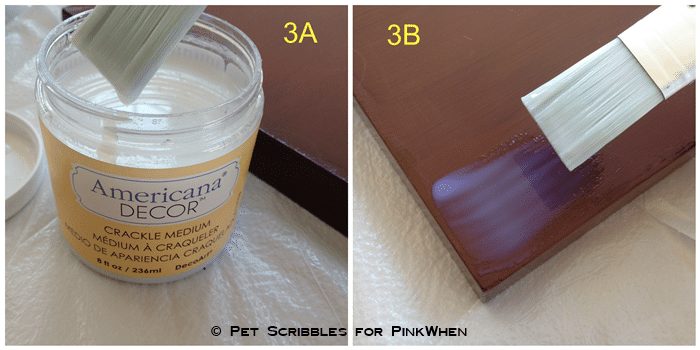
- Crackle Medium (Americana Decor)
- Fleur de Lis Tile Stencil (Americana Decor)
- Glamour Dust Glitter Paint in Turquoise Sparkle (DecoArt)
- Paint brush
- Stencil brush
- Painter’s tape
- Wax paper (handy to use when painting, as your project won’t stick to it that easily while drying)
- Paper towels
French Decor – French Shabby Box Tutorial
Step One: Adhere painter’s tape to the inside edges of both halves of the tea box. (1A) Flip each half over so the box is resting on the painter’s tape, on top of your wax paper. (1B) This will ensure that you don’t get any paint underneath the sides. (1C)
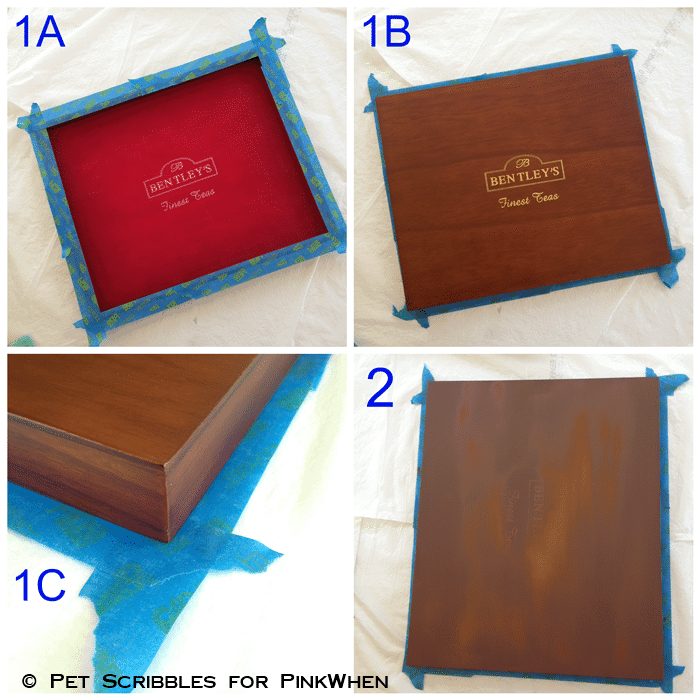
Step Two: Paint both halves of the box with one coat of brown chalky finish paint. (2) Let dry.
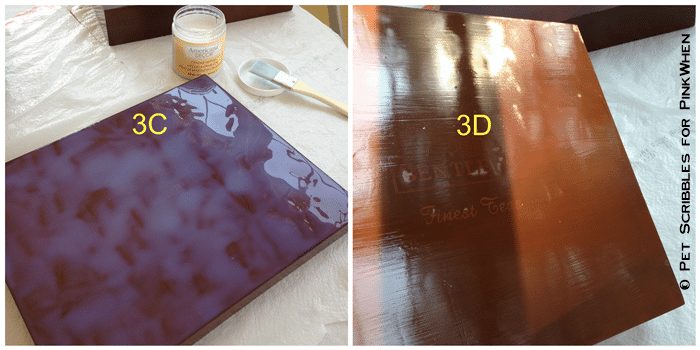
Step Three: Apply the Crackle Medium with a paint brush over the brown paint. Get a generous amount on your brush. (3A) Apply an even coat of the Crackle Medium over the entire surface of each half of the box. (3B)
Note: Brush Crackle Medium across for horizontal cracks, and brush up and down for vertical cracks.
I did a mix of both!
I painted the Crackle Medium onto the sides first and let them dry before painting onto the surface of the box top. (There’s no need to paint the bottom of the box.)
The Crackle Medium will look milky white when wet (3C) and then dry to a semi-shiny finish. (3D)
Once the Crackle Medium has completely dried, it’s time to paint your top color. This is the color that will crack as it dries, exposing your base color through the cracks. (And it is SO cool to watch it happen!)
Step Four: Get a good amount (but not too much) of the beige-grey chalky finish paint on your brush. (4A) Again, work in small sections, starting with one of the sides. Brush the paint on quickly in one direction, and try not to go over the paint. (4B) Cracks will begin to appear almost immediately!
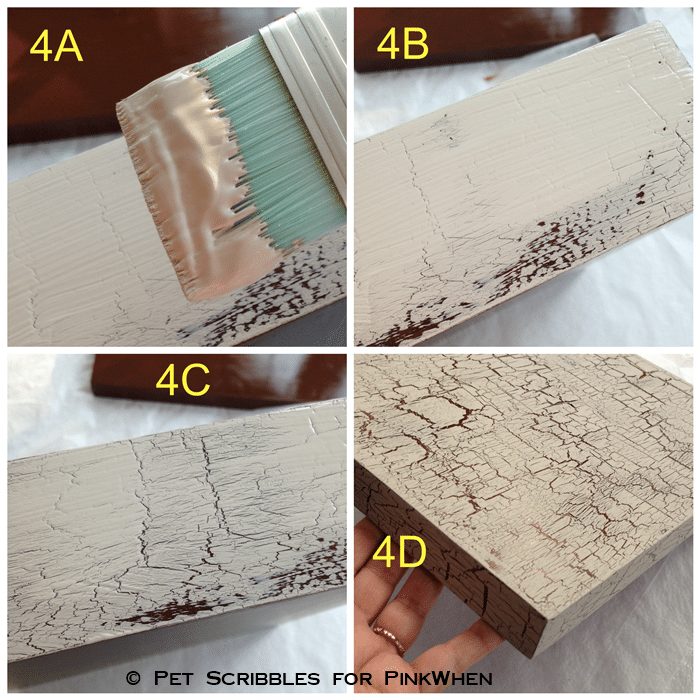
Picture (4C) was taken about two minutes after (4B). That’s how fast the cracking kicks in! Let this layer of paint dry completely, to make sure all of the cracking as taken place. (4D)
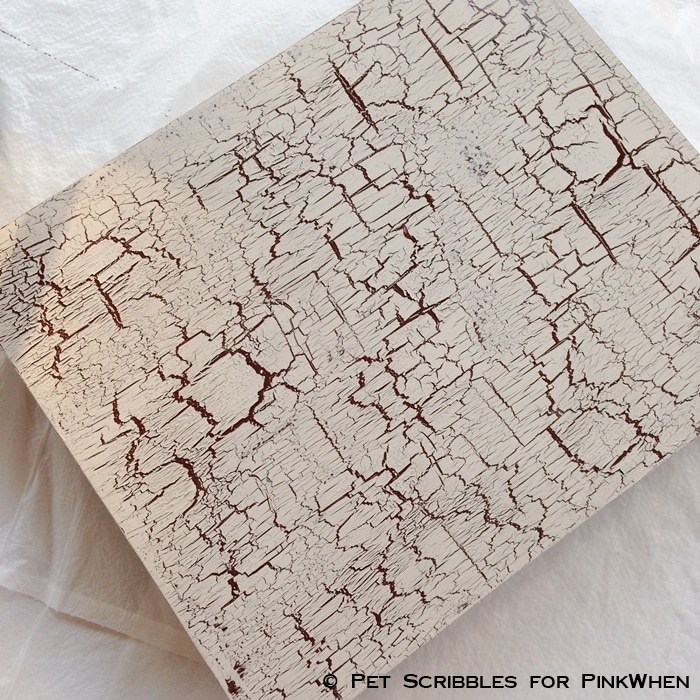
You could stop here, as the box looks so pretty as is, right?
What’s great about this crackle finish is that you can still easily open and close the box.
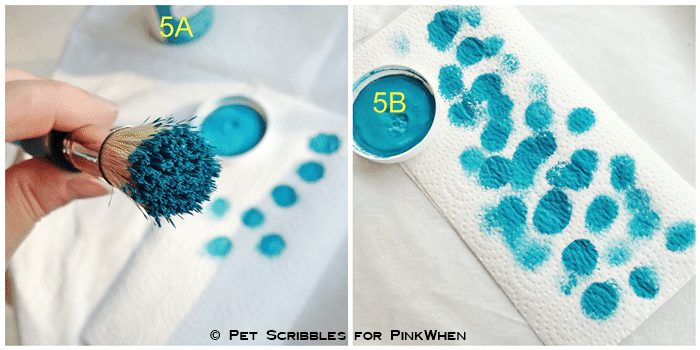
Step Five: Stencil on a fleur de lis stencil use chalky finish paint in teal. Get just a bit of paint on your stencil brush, then blot most of it off on a paper towel before painting the stencil design. (5A and 5B) This ensures you won’t have any drips that might sneak underneath the plastic stencil.
Note: Before I stencil, I always use painter’s tape to hold the stencil in position. Don’t forget that you can also use painter’s tape to mask out part of a design you don’t wish to include. Be careful pulling the painter’s tape off of the painted surface and off of the stencil. Slow and steady . . .
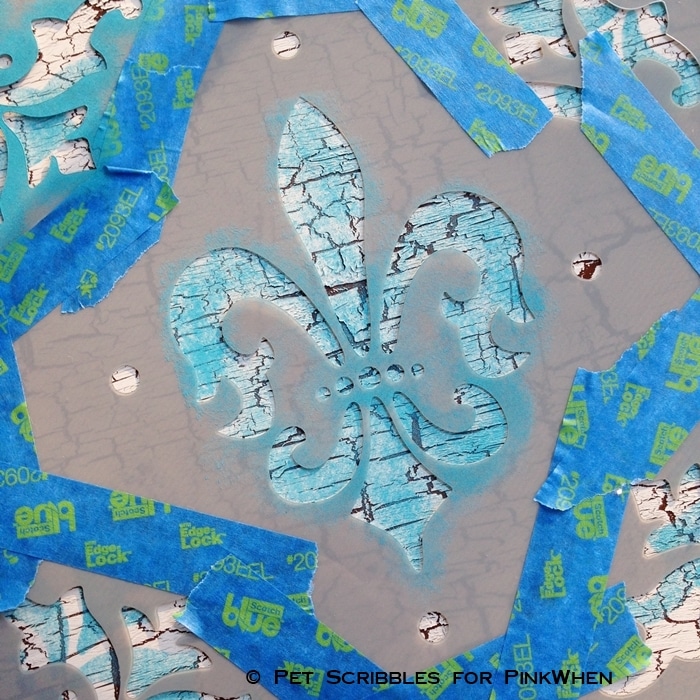
Step Six: To give the fleur de lis design a little bit of sparkle, I put the stencil back on and added a bit of Glamour Dust glitter paint with my stencil brush. (This paint has the tiniest of sparkle to it, not like regular glitter paints. It’s a beautiful way to add some shimmer to a project without overwhelming the design.)
You can see a bit of the shimmer in the photo below:

Step Seven: (Optional) Use an acrylic sealer or varnish for added protection of your painted box.
Quite a makeover for our humble, empty tea box!
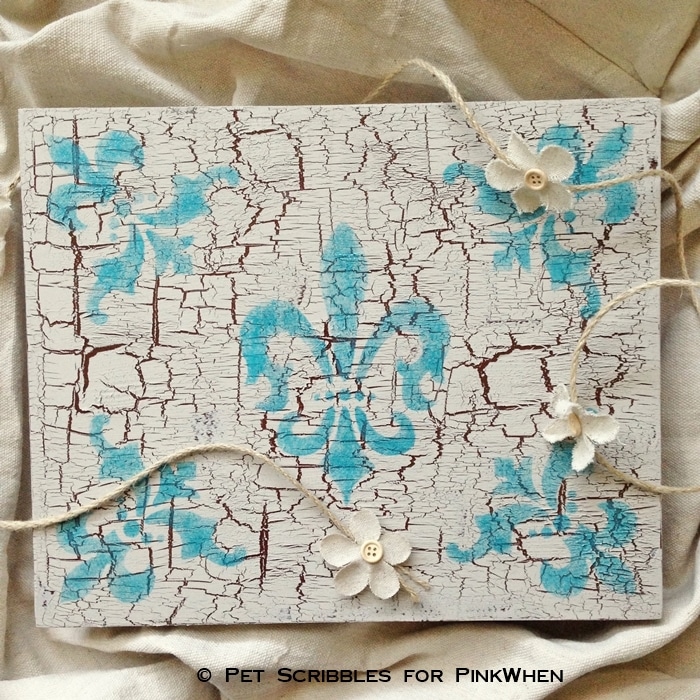
This French Shabby Box will make a great display piece year-round, and I plan on leaving it open to display special ornaments in it during the holidays! Actually, I might start with pinecones first!
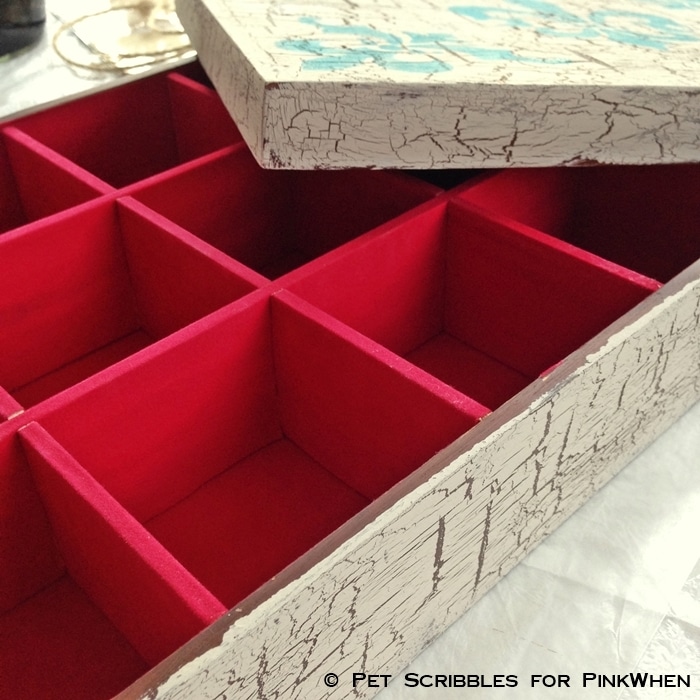
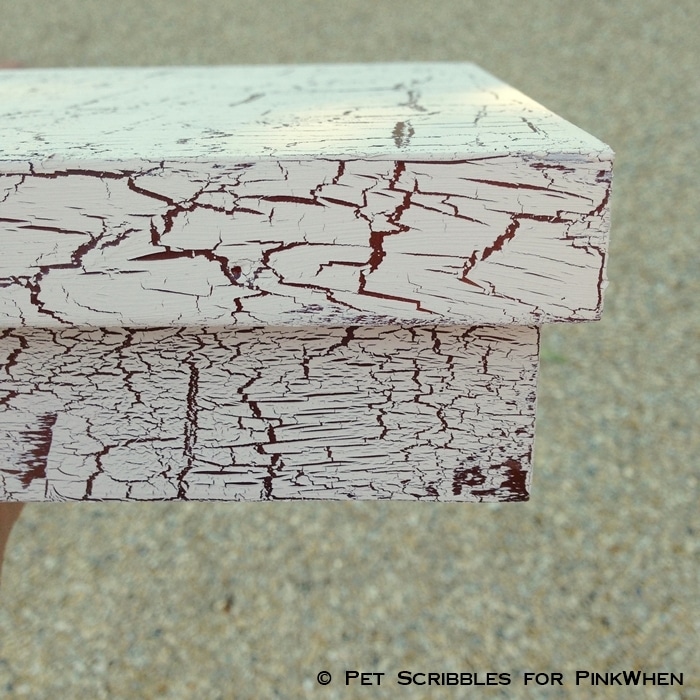
And from the Keeping It Real department: notice all of the beige-grey paint on the edges of the box above? I didn’t put painter’s tape on the edges before doing the top color. Whoops. Do as I say, not as I do. 😉
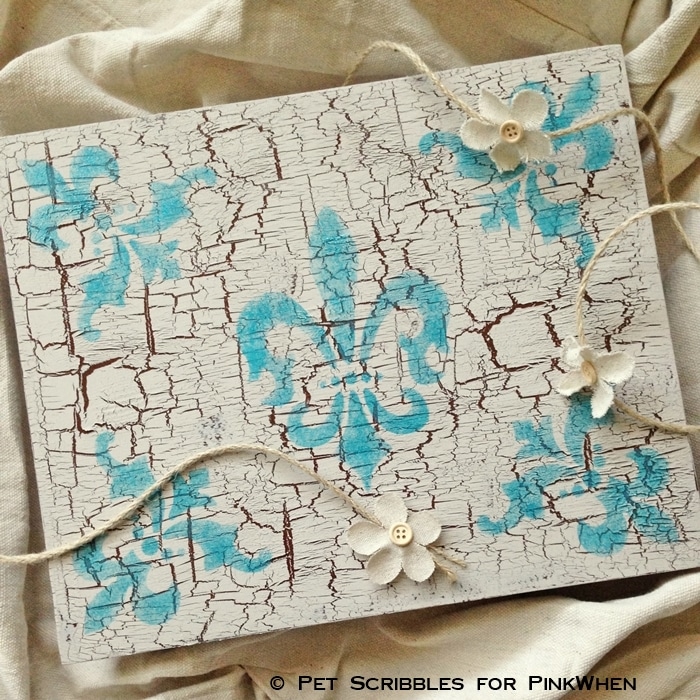
Do you like French decor and want more shabby goodness?
Check out my recent tutorial for making Shabby Books by recycling old books, and my Shabby Altered Bottle which I made from a recycled empty maple syrup bottle! And don’t forget my easy Glass Vase Makeover I shared with you here on PinkWhen in the Spring too!
Happy crafting!
~Laura



That’s really pretty, where do you get Tea boxes that big ? I’m used to Tea coming in paper boxes from the grocery store, like Lipton or Twining Teas. Thanks for sharing your project.