I love to create projects with my Silhouette machine. There are a lot of different things you can do with it, and last week I shared a post for a Peppermint Sugar Bath Scrub. I had a ton of people asking me over social media how I created the labels, so today I am going to show you how to create sticker labels with the Silhouette machine.
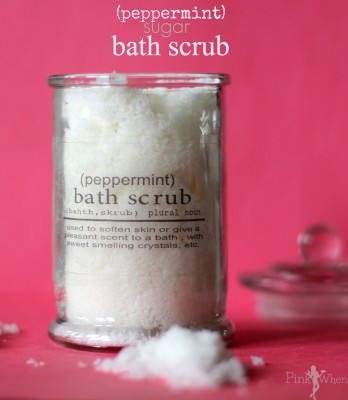
This is going to be step by step for how I create my labels. This may not be how everyone else create’s their labels, but for me- it is the quickest and easiest way.
How to Create Sticker Labels with Silhouette Machine
Step 1: Open the Silhouette Studio program and create a 8 x 10 page onto a 12 x 12 cutting mat.
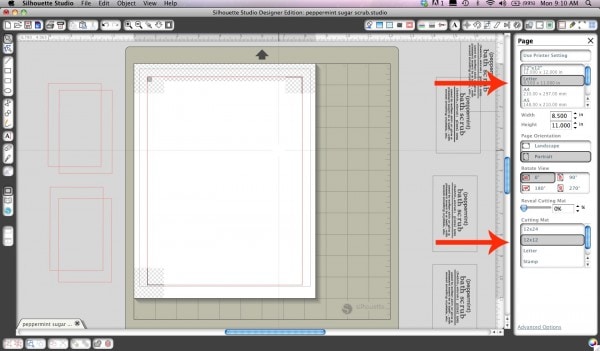
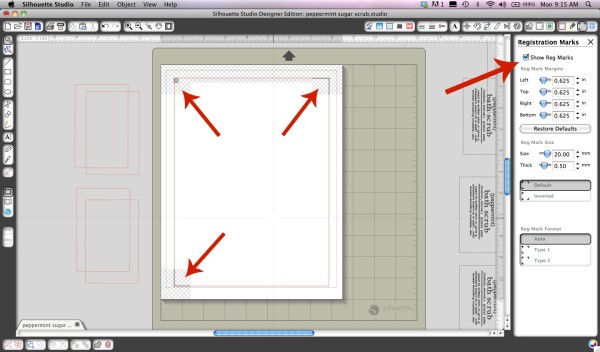
Step 2: While I already have it done in the first picture, you will also need to open up Registration Marks settings window. Click on Show registration marks to get registration marks for the Silhouette to read while cutting.
Step 3: Click on the text tool in your left sidebar and then type in the information you would like to share. You can also change the fonts by clicking the different fonts in the right sidebar.
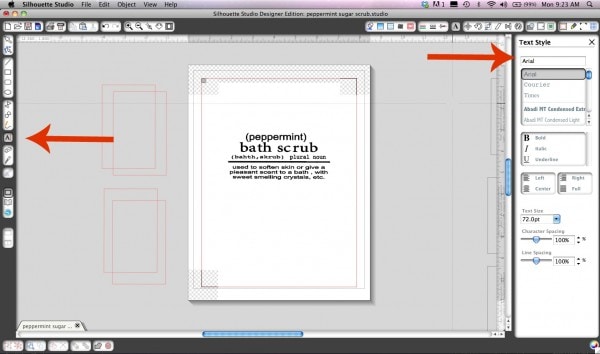
Step 4: Make sure that you group all of your texts together so that you can move and resize the newly created label. Just click and cover the entire text in a box, and then click on the GROUP button to make them one.
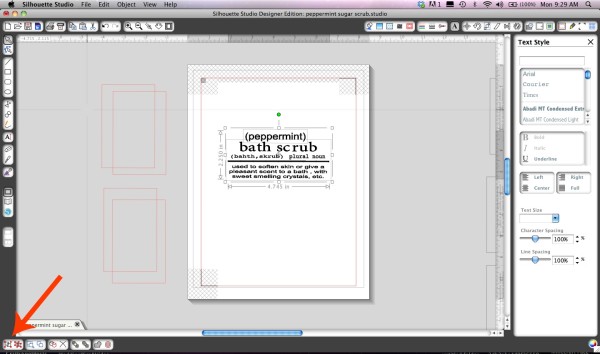
Step 5: After you have all of the text grouped as your new label, resize to your desired sticker size. I then create a box to go around my label, and size it accordingly.
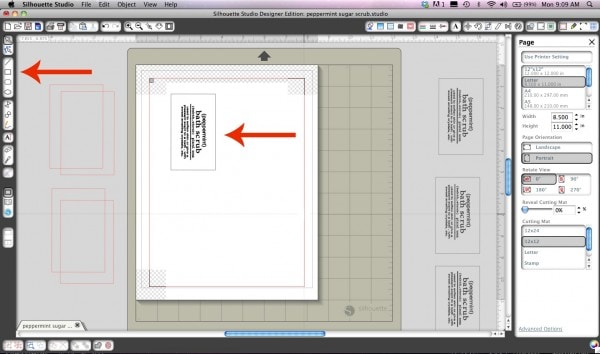
Step 6: After the sticker is resized and has a box, group it again with the box, and then duplicate them and place them on the page for printing.
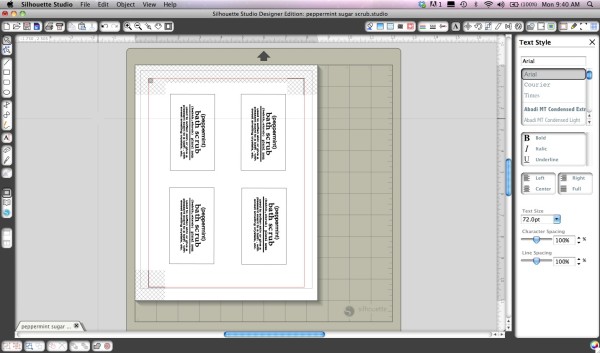
Step 7: Once this is created, then take the sticker paper and place it in your home printer. Then hit print.
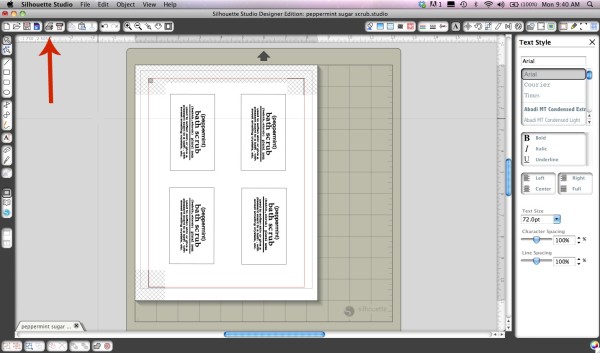
Create Sticker Labels
Step 8: Once you have your sheet printed, place it onto the cutting mat and load it into the Silhouette machine. After you have it loaded into the machine, have the Silhouette detect registration marks. To do this you will tell your Silhouette to CUT and send it to the machine, then skip printing (you already have it printed) and then have it detect the registration marks automatically.
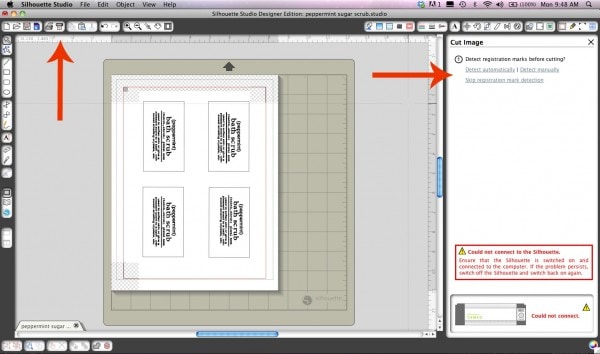
Step 9: After the registration marks have been detected and the stickers are ready to print, I go back remove the text. To do this I ungroup the text from the sticker and leave only the box to be cut.
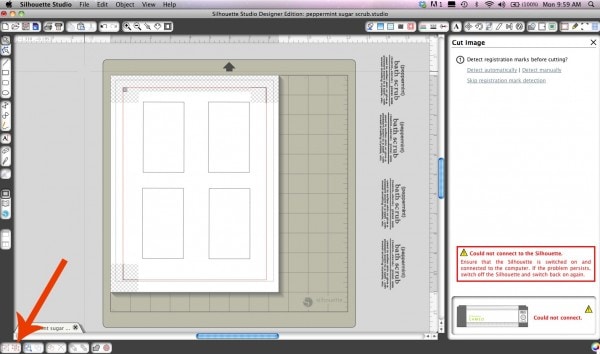
Step 10: After you have everything set, make sure you have the correct cut setting selected and then cut.
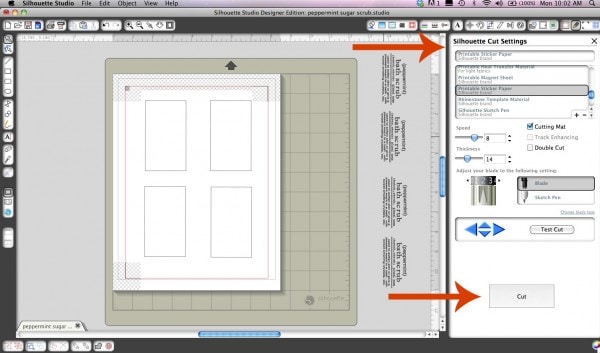
You have now just created your labels! The Silhouette Machine will cut around the box and will have your stickers cut to the size indicated. There are other ways to actually create and print your stickers, but this is a quick and easy 10 step process that I use every single time without any issue.
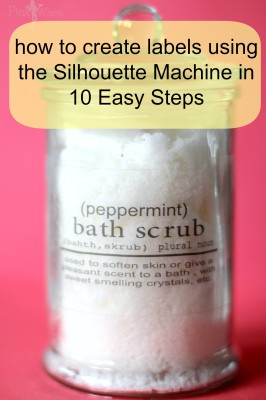
I hope you feel like you have a much better understanding of how to create sticker labels with the Silhouette Machine now. If you still have questions, just leave me a message in the comments and I will get back to you as soon as possible. Now go create sticker labels and have fun!
If you enjoyed this post, you might also like:



Great tutorial! Just what I needed since I’ve just recently purchased a Silhouette. Would love to know what you use for the clear sticker paper/where you buy it.
Hi Mindy! It is actually the clear sticker paper you can purchase from Silhouette! You may be able to find it in a local crafting store, but I have always ordered mine online. Hope that helps! Have fun with you Silhouette, I adore mine!
I use my scrub in the shower, so I’m wondering if this would be water resistant? or how to make it so.
thanks
I don’t think the adhesive would be able to handle the water and steam of a shower for long. If you want it to be water resistant, I would add in an additional water proof glue to make sure it stays. (Krazy glue, etc.)
Hi, there! I know this is probably a silly question, but do you think this tutorial would also work with the Cricut? I don’t have a Silhouette Machine, but looking around, they seem similar. Thanks!
Hi Brittany, I have never worked with a Cricut before, but I am sure they have something similar to make it work. If not, you could always use your printer and the sticker paper and then hand cut your labels. Hope that helps!
Do you have a template for this label that I could use with the silhouette? I would be happy to pay for it. Also, could you use this with vinyl?
If you used this with vinyl, you would probably have to make it larger so you could easily transfer the vinyl over to your project. The sticker labels I created here are small and fit a Mason sized jar. I would have to look and see if I have the template saved, but I probably printed what I needed and didn’t save it. However, it is really easy to create and as long as you are able to write text in your Silhouette software you can easily recreate this as well. Hope that helps! 🙂
Would you or do you know of anyone who would create custom labels to sell?
I actually do not know anyone who creates labels, but I am almost positive you could find someone on ETSY that would do it.
Great Tutorial Thanks Jennifer
Great tutuorial! I just got a Cameo this past Christmas and still learning the machine. I make my own scented container candles and was wondering how to created labels using my Cameo. I will try using your10 steps methods.
Did you print it on Inkjet or laser printer? Does the print come off from the sticker with rough handling?
I used a laser jet, and it will come off if it gets wet. There is a spray (I’m going blank on it right now…I will come back and edit when I remember the name) you can use that will seal the label so it will not run.
LOVE this look so much! I have googled and re-googled this tutorial so many times. I could put these labels on everything in my house!!
http://partnparcelstudio.com/