• Start Here
    • Work With Me
  • Recipe Index
    • Slow Cooker Meals
    • Instant Pot Recipes
    • Air Fryer Recipes
    • Soups & Chilis
    • Desserts
    • Ingredients
      • Beef
      • Chicken
      • Pork
      • Seafood
      • Vegetables
    • Meals
      • Appetizers
      • Breakfast
      • Desserts
      • Dinner
      • Lunch
      • Side Dish
    • Popular
      • 30 Minute Meals
      • Casseroles
      • Instant Pot Recipes
      • Air Fryer Recipes
      • Simple Fit Forty
      • Slow Cooker Meals
      • Soups & Chili
  • 30 Minute Meals
  • Weekly Meal Plan
  • Crafts & DIY
    • How to Use Essential Oils
    • Essential Oil Uses
    • Silhouette Crafts
    • DIY Furniture
    • Knitting and Sewing Projects
    • DIY Gift Ideas
    • Free Printables
    • Holiday Crafts
    • No Sew Projects
  • Nav Social Menu

    • Facebook
    • Instagram
    • Pinterest
    • Twitter
    • YouTube
Header logo for homepage

PinkWhen

Easy Recipes for Everyone

How to Make a Picture Frame

Home » Crafts & DIY » How to Make a Picture Frame

Published July 31, 2013 by Jennifer. 1 Comment.
This post may contain affiliate links. Your cost is the same but it helps support this site and the fun freebies we share. See our full disclosures here.

Share
Pin
Share
Share

How to Build a Picture Frame

1754610_orig


I had to learn how to build a picture frame for my WeMontage post earlier in the week, and of course wanted to do it myself. I love the montage all by itself, but really wanted to frame it and make it stand out. Due to the size of the picture frame I needed, I had to learn how to build a frame, or pay hundreds of dollars having one custom built. Making a picture frame can be both rewarding, and maybe a little challenging. The most challenging part of building a picture frame is choosing your product to use, and then cutting the correct angles. Today I am going to show you how I built a picture frame for the WeMontage, and I am also going to tell you about a few mistakes I made while building so you can avoid those! You can also make a smaller frame using the same items below!

Supplies needed:
Wood or Crown Moulding (I used crown moulding, which is very pliable, and easy to break)
Circular or Table saw to cut your angles (and all safety gear to go with it)
Finishing screws
Kreg jig
Wood glue
Tape Measure
Pencil (with eraser if you are like me)
220 Sand paper
Supplies

Supplies

The first thing you want to do is measure your boards for the length of the picture you are framing. This is the length of the inside of the board, and then your angle will make the actual board longer. For instance, the portion of the frame that is next to the picture boards are 72″ long, and they are 82″ along the top after including the angle. Those are my 1 and 4 boards. Your 1 and 4 boards should be the same, and your 2 and 3 boards (42″ on the inside, 52″ on the outside for the WeMontage 6ft x 4ft frame) should be the same. See diagram below:

Measuring and Cutting your angles

Measuring and Cutting your angles

Take your Kreg jig and place the angled portion of the frame on the bottom. Then using your drill bit go ahead and make your holes for the screws.

Angle pieces and drill holes

Angle pieces and drill holes

This step is for a smaller frame. For the large 6ft x 4ft frame I made, this step will NOT work because of the type of material I used. I did attempt, but my boards were so heavy they stripped the screws right out because it is a composite and not wood. It was just too heavy. Using wood is much easier, and placing these together with wood glue and letting dry will work! A 6ft x 4ft frame on the wall would be extremely heavy, so this is why I chose composite, and also why I had to skip this step. For making your smaller picture frame you will want to do this, or if you are using wood you will want to do these holes with the Kreg jig.

After placing your holes with your Kreg jig, add some wood glue to the inside pieces, clamp them together, and then screw your pieces together.
Use wood glue and a clamp, then place screws into the holes your made with the jig to secure

Use wood glue and a clamp, then place screws into the holes your made with the jig to secure

(Note I did not have the pieces completely together in the picture above, but you want to get them as close as possible.) This works really well on a small wooden frame. Our six foot by four foot frame was a beast to handle, so we opted to keep the pieces separate and attach directly to the wall.

Once you have your pieces together, or if building a large frame like this, you need to attach it to the wall. Measure your spot, use your stud finder, and grab the level. You want your work to be hanging straight!

Once you have your frame together you need to fill in any cracks. Sand if you had to use filler, but if your angles are right, you shouldn’t need any filler. (I needed a little filler for my angles and to cover up my drill holes.)

Add filler, sand, paint, and finish!

Add filler, sand, paint, and finish!

Stay tuned for tomorrow’s post on how to apply an antique finish to your frame.

Are you enjoying this weeks pictures and frames? I really love them!

The Final Product

The Final Product

Ready to give this a try? You can purchase your WeMontage all week this week for a 50% off savings with promo code:  PINKWHEN  

I would love for you to stay in touch and follow me here:
Share
Pin
Share
Share

July 31, 2013 · 1 Comment

MORE FROM PINKWHEN!

DIY Face Mask Tutorial
T Shirt Face Mask Tutorial
Homemade Disinfecting Wipes in a glass jar.
Homemade Disinfecting Wipes – Great for Cleaning
25 Shower Bombs That Make Perfect Gifts

ABOUT JENNIFER

about me

Do you feel like there is not enough time in the day? I'm with you. Hi! I'm Jen, a wife, mother, and tennis lover who likes to share all of my quick easy recipes, crafts, and more. You can find anything from delicious 30-minute dinners or scrumptious dessert recipes the whole family will love. Read more...

Previous Post: « How to Frame a Canvas Print and Easy Canvas Review
Next Post: How to Antique Finish a Frame »

Reader Interactions

Leave a Reply Cancel reply

Your email address will not be published. Required fields are marked *

Recipe Rating


This site uses Akismet to reduce spam. Learn how your comment data is processed.

Primary Sidebar

Welcome!

about holly

Do you feel like there is not enough time in the day? I'm with you. Hi! I'm Jen, a wife, mother, and tennis lover who likes to share all of my quick easy recipes. Wondering why my site is called PinkWhen? Click in the top left corner START HERE to read more about it!

  • Facebook
  • Instagram
  • Pinterest
  • Twitter
  • YouTube

Search

Popular Posts

  • Crescent dogs in an Air Fryer basket and on a white plate.
    Air Fryer Pigs In A Blanket
  • Slice of cheeseburger pie on a white plate with a fork
    Cheeseburger Pie
  • Slow Cooker Salisbury Steak in the liner of a Crock pot.
    How to Make Slow Cooker Salisbury Steak
  • Corn dogs in a single layer in an Air Fryer basket.
    Air Fryer Corn Dogs
  • Start Here
  • Recipe Index
  • 30 Minute Meals
  • Weekly Meal Plan
  • Crafts & DIY

Footer

Popular

Homemade Lavender Lotion Bars

How to Make Homemade Lavender Lotion Bars

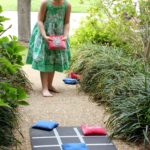
Tic Tac Toe Backyard Bean Bag Toss

Tic Tac Toe Backyard Bean Bag Toss

Glass Vase Makeover

Featured

Crescent dogs in an Air Fryer basket and on a white plate.

Air Fryer Pigs In A Blanket

Slice of cheeseburger pie on a white plate with a fork

Cheeseburger Pie

Slow Cooker Salisbury Steak in the liner of a Crock pot.

How to Make Slow Cooker Salisbury Steak

Latest

Corn dogs in a single layer in an Air Fryer basket.

Air Fryer Corn Dogs

Taco casserole made with chicken covered with sour cream and green onion tops and ready to serve.

Chicken Taco Casserole

Avocado Egg Salad in a bowl.

Avocado Egg Salad

Copyright © 2021 pinkwhen.com. All rights reserved. Privacy Policy. Cookie Policy.

We use cookies to ensure that we give you the best experience on our website. If you continue to use this site we will assume that you are happy with it.Ok