• Start Here
    • Recipe Index
      • Instant Pot Recipes
      • Air Fryer Recipes
      • Soups & Chilis
      • Desserts
      • Ingredients
        • Beef
        • Chicken
        • Pork
        • Seafood
        • Vegetables
      • Meals
        • Appetizers
        • Breakfast
        • Dinner
        • Lunch
        • Side Dish
      • Popular
        • 30 Minute Meals
        • Casseroles
        • Simple Fit Forty
        • Slow Cooker Meals
        • Soups & Chili
        • 30 Minute Meals
        • Weekly Meal Plan
        • Crafts & DIY
          • How to Use Essential Oils
          • Essential Oil Uses
          • Silhouette Crafts
          • DIY Furniture
          • Knitting and Sewing Projects
          • DIY Gift Ideas
          • Free Printables
          • Holiday Crafts
          • No Sew Projects
  • Air Fryer Recipes
  • Slow Cooker Meals
  • Instant Pot Recipes
  • Desserts
  • Nav Social Menu

    • Facebook
    • Instagram
    • Pinterest
    • Twitter
    • YouTube
Header logo for homepage

PinkWhen

Easy Recipes for Everyone

DIY Valentine Glitter Heart Personalized Mug

Home » Crafts & DIY » DIY Valentine Glitter Heart Personalized Mug

Published January 15, 2014 by Jennifer. 42 Comments.
This post may contain affiliate links. Your cost is the same but it helps support this site and the fun freebies we share. See our full disclosures here.

Share
Pin
Share
Share

I love a good DIY personalized mug. Are you looking for a great gift for a friend or teacher this upcoming Valentine’s Day? Today I am going to share a cute and easy tutorial for a DIY Valentine Glitter Heart Mug. 
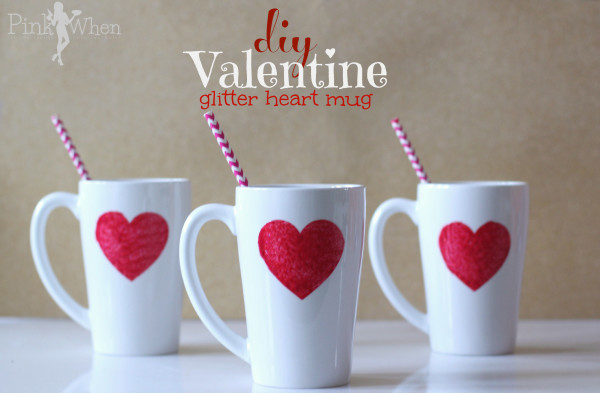
DIY Valentine Glitter Heart Mug

These Valentine’s Day gifts are great for the kids to give, and an easy project for you and the little one to make. It doesn’t take too much time, and once cured can even be dishwasher safe!

DIY Valentine Glitter Heart Mug

I love making personalized mugs. This is an easy DIY personalized mug and it is very easy to make.

Here is a quick list of the items you will need (some optional):

  • mug(s)
  • Americana Crystal Glitter Gloss Enamels in Red
  • vinyl
  • optional: vinyl cutting machine to cut the heart, or you can hand cut if you do not have access to a vinyl cutting machine
  • access to an oven

How to Make a DIY Personalized Mug

Step 1:  The first thing you will need to do is clean your mugs, and then clean the surface you are placing the stencil on with alcohol.

DIY Blank Mugs

Step 2:  Next you will want to cut out your vinyl and then place on the mug in the desired spot.
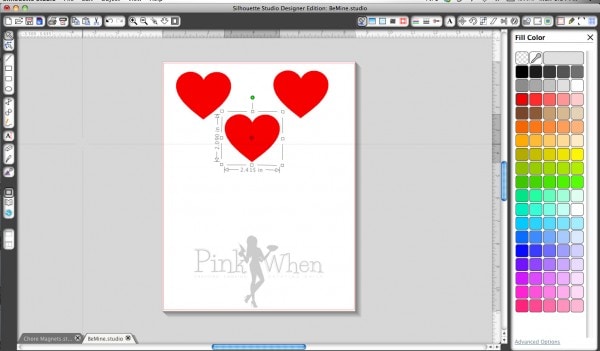
SilhouetteVinylCutOut

Step 3:  Paint (by dabbing, not brushing) on your glitter enamel.
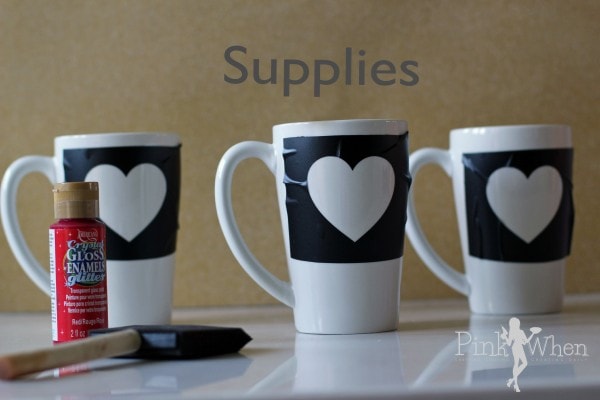
DIY Valentine Mug Supplies

Step 4:  Remove the vinyl once painted, and then carefully using a Q-Tip remove any bleed thru paint you may have encountered.
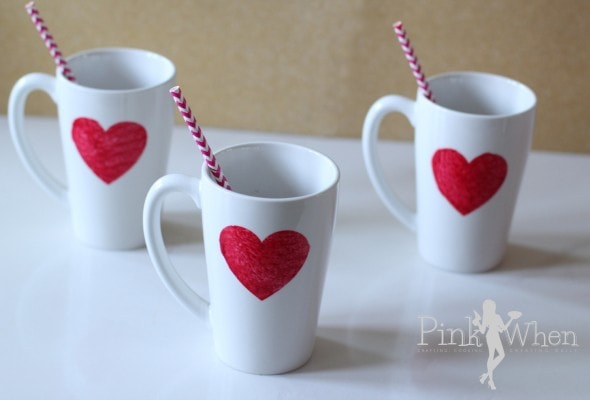
DIY Glitter Heart Mug Gift

Step 5:  Allow the mug to dry for 4 days. Then bake in an non-preheated oven on 275 degrees for 30 minutes. Open the oven door and allow to completely cool.

DIY Valentine Glitter Heart Mug

Once you have completed all of these steps, your mug is now dishwasher safe! Just make sure not to eat or drink off of the painted portion. (Which could be hard, but not impossible!)

This is such a cute and simple gift, and one that will have the Teacher Appreciation level elevated when they receive their thoughtful Valentine’s Day gift!

Make sure to give this sweet DIY Valentine Glitter Heart Mug a try for this Valentine’s Day! Are you making teacher Valentine’s Day gifts?

Did you enjoy this project? You might also like:

  • Lavender Salt Scrub
  • 25 Shower Bombs
  • Sugar Scrub Recipe

You might also like this recipe for Chocolate Strawberry Hearts!

Share
Pin
Share
Share

January 15, 2014 · 42 Comments

MORE FROM PINKWHEN!

Valentine's Day Pretzel treats
How to Make Valentine’s Day Pretzel Treats
DIY Face Mask Tutorial
T Shirt Face Mask Tutorial
Homemade Disinfecting Wipes in a glass jar.
Homemade Disinfecting Wipes – Great for Cleaning

ABOUT JENNIFER

about me

Do you feel like there is not enough time in the day? I'm with you. Hi! I'm Jen, a wife, mother, and tennis lover who likes to share all of my quick easy recipes, crafts, and more. You can find anything from delicious 30-minute dinners or scrumptious dessert recipes the whole family will love. Read more...

Previous Post: « Slow Cooker Sausage Gumbo Recipe
Next Post: Valentine Be Mine Free Printable »

Reader Interactions

Comments

  1. Michelle says

    January 15, 2014 at 08:07

    Very cute and looks fairly easy too!

    Reply
    • Jennifer says

      January 15, 2014 at 17:11

      Awe, thanks Michelle! It’s quite easy, actually!

      Reply
  2. Tamara says

    January 15, 2014 at 10:58

    Gorgeous, gorgeous! You should do a giveaway for one! (I say because I like yours and don’t believe my own would look that good)

    Reply
    • Jennifer says

      January 15, 2014 at 17:12

      You could totally make one JUST like this. All you have to do is cut out a heart, or go and buy one already cut out! Simple. You CAN do this! 🙂

      Reply
  3. Marcy @ day2day SuperMom says

    January 15, 2014 at 14:30

    Love this, seriously! Great tutorial too. Thanks for thinking of us sad girls who don’t have a vinyl machine =( yet! hahahah! Pin’ing & sharing!

    Reply
    • Jennifer says

      January 15, 2014 at 17:12

      Haha! You could totally do this without vinyl 🙂

      Reply
  4. Crystal @ Sew Creative says

    January 15, 2014 at 14:37

    Thank you so much for sharing this Jen! I tried making a DIY Sharpie decorated mug that you baked in the oven but the sharpie wiped right off. I’m very excited to try this one out. I would love to whip up a batch of adorable mugs.

    Reply
    • Jennifer says

      January 15, 2014 at 17:13

      Ohhh…I hate it when things like that happen. DIY fails…grrrr. So glad you like this, I have a glass company here so I can get these relatively cheap~

      Reply
  5. Kimber says

    January 15, 2014 at 19:33

    I love these! I just had a fun mug idea swirling around in my mind too!

    Reply
    • Jennifer says

      January 15, 2014 at 19:44

      Aren’t these cool! The little one always wants hers to drink out of!

      Reply
  6. Amee @ didsomeonesaychocolate.com says

    January 16, 2014 at 00:38

    Ahhhh so cute! I think I want to make these for my girls!

    Reply
    • Jennifer says

      January 16, 2014 at 07:39

      Thanks Amee, my little one is LOVING hers!

      Reply
  7. Shana Norris says

    January 16, 2014 at 09:40

    I’m going to be near a Michaels tomorrow and am totally buying some of that glitter enamel!

    Reply
    • Jennifer says

      January 16, 2014 at 14:46

      Haha! You are going to LOVE this! Just remember, even though they are dry to the touch, let them dry for FOUR days before you place them in the oven. 🙂

      Reply
  8. Cathy@LemonTreeDwelling says

    January 16, 2014 at 11:07

    These are perfect, Jennifer! Thanks so much for sharing such an adorable idea!!

    Reply
    • Jennifer says

      January 16, 2014 at 14:43

      Thanks Cathy! So happy you like them 🙂

      Reply
  9. Meme says

    January 16, 2014 at 15:29

    I am obsessed with these!!! I must make them. I must, I must!

    Reply
    • Jennifer says

      January 16, 2014 at 15:33

      Haha! I love it. My toddler is also obsessed with these….every day…first thing in the morning…”Mommy I want my Heart cup!”

      Reply
  10. Angela @Little Apple Tree says

    January 18, 2014 at 17:30

    These are so pretty! I have no idea if I can get the paint over here…will have to keep an eye out for it. Great idea!

    Reply
    • Jennifer says

      January 19, 2014 at 08:32

      Thanks Angela, they are soooo cute! Hopefully you can order it if you can’t find it.

      Reply
  11. popcosmo says

    January 19, 2014 at 16:49

    Love this bold and simple design! What a great teacher’s gift!

    Reply
  12. Corey @ Tinysidekick says

    January 21, 2014 at 23:00

    These are super cute! I’d love for you to come link up at The Makers going on now at TinySidekick.com! Hope to see you there!

    Reply
  13. Jillian Tohber Leslie says

    January 29, 2014 at 11:45

    They looks so gorgeous!

    Reply
    • Jennifer says

      January 29, 2014 at 12:46

      Thanks Jillian!

      Reply
  14. Ashley says

    January 13, 2016 at 07:34

    My kids would go crazy over these… making them and using them! Stopping by from the Dream. Create. Inspire linky party. Have a great day!

    Reply
  15. Johlene@FlavoursandFrosting says

    January 13, 2016 at 07:37

    I think this is so cute!! I don´t have a vinyl machine and not even sure where I would find vinyl here in Spain where I live, could I use something else?

    Reply
    • Jennifer says

      January 13, 2016 at 14:00

      You could possibly order online and have it delivered? You could hand cut tape and use that as your baseline as you paint. It would be a little harder, but give you similar results. 🙂

      Reply
  16. Cara says

    January 13, 2016 at 09:25

    So cute! Such an easy valentines DIY. Thanks for sharing!

    Reply
  17. lauren says

    January 14, 2016 at 14:43

    These are adorable! I need to try these one day!

    Reply
  18. Holly says

    January 14, 2016 at 23:03

    Adorable! You make it look way to easy! Holly 🙂

    Reply
  19. Tori Cole says

    January 18, 2016 at 13:58

    Seriously awesome!! I’m definitely going to be doing this! Thank you!

    Reply

Leave a Reply Cancel reply

Your email address will not be published. Required fields are marked *

Recipe Rating


This site uses Akismet to reduce spam. Learn how your comment data is processed.

Primary Sidebar

Welcome!

about holly

Do you feel like there is not enough time in the day? I'm with you. Hi! I'm Jen, a wife, mother, and tennis lover who likes to share all of my quick easy recipes. Wondering why my site is called PinkWhen? Click in the top left corner START HERE to read more about it!

  • Facebook
  • Instagram
  • Pinterest
  • Twitter
  • YouTube

Search

Popular Posts

  • Delicious Chicken and Dressing Recipe | PinkWhen
    How to Make a Delicious Chicken and Dressing Recipe
  • Overhead shot of an easy summer pasta salad recipe ready to serve.
    Summer Pasta Salad
  • fully cooked and seasoned chicken breasts made from frozen in the air fryer.
    Frozen Chicken Breasts in the Air Fryer
  • Fully cooked frozen chicken pattie made in the air fryer and dressed on a bun.
    Frozen Chicken Patties in Air Fryer
  • Start Here
  • Air Fryer Recipes
  • Slow Cooker Meals
  • Instant Pot Recipes
  • Desserts

Footer

Popular

Homemade Lavender Lotion Bars

How to Make Homemade Lavender Lotion Bars

Tic Tac Toe Backyard Bean Bag Toss

Tic Tac Toe Backyard Bean Bag Toss

Glass Vase Makeover

Featured

Crawfish Pie sliced and ready to eat.

What to Serve with Jambalaya

Delicious Chicken and Dressing Recipe | PinkWhen

How to Make a Delicious Chicken and Dressing Recipe

Overhead photo of copycat KFC coleslaw with a serving spoon.

KFC Coleslaw Recipe

Latest

Overhead shot of an easy summer pasta salad recipe ready to serve.

Summer Pasta Salad

fully cooked and seasoned chicken breasts made from frozen in the air fryer.

Frozen Chicken Breasts in the Air Fryer

Fully cooked frozen chicken pattie made in the air fryer and dressed on a bun.

Frozen Chicken Patties in Air Fryer

Copyright © 2023 pinkwhen.com. All rights reserved. Privacy Policy. Cookie Policy.