Working with The Home Depot on the outdoor and gardening campaign has been fun, and for my last post I am going to be using those wonderful herbs I purchased last week on my shopping spree.
I have always wanted to make an herb garden, but with a small yard, 4 children, and 2 dogs, there is not much room left for an herb garden, or any garden for that matter. That was an issue until I came upon the wonderful pallet garden on Pinterest a few weeks ago.
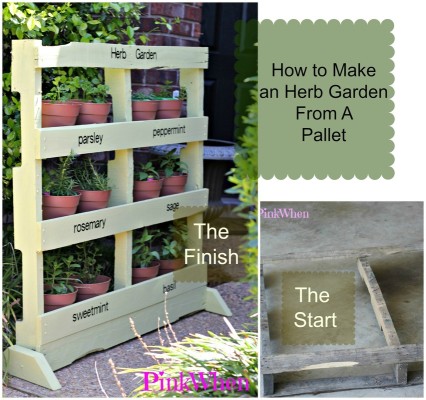
How to Make a Pallet Herb Garden
Working with The Home Depot on the outdoor and gardening campaign has been fun, and for my last post I am going to be using those wonderful herbs I purchased last week on my shopping spree.
I have always wanted to make an herb garden, but with a small yard, 4 children, and 2 dogs, there is not much room left for an herb garden or any garden for that matter. That was an issue until I came upon the wonderful pallet garden on Pinterest a few weeks ago.
I was excited to find that Pinterest picture, because just a few short weeks ago when we had sod delivered, they delivered it on 3 pallets! The only problem, those pallets were in very bad shape. These were the saddest and most beat up pallets I have ever seen. I sorted them out and decided on a pallet I wanted to use.

Once I removed all of the broken and rotten boards, I was basically left with a frame, and still a very sad looking frame at that.
To get back what I needed for my herb garden, I cut a three 1 x 4 boards I had laying around from a previous project.

I then broke out my Kreg jig. This is an amazing piece of equipment, and I can’t imagine life without my Kreg.

After creating the pocket holes, I went ahead and simply attached them to my pallet.
(Please ignore the mess behind my pallet)

After adding the shelves, it was then time to add the facing to hide the shelves.

The other thing you might notice in this picture is the feet I added to the pallet. I didn’t want to lean this up against a wall, and I happened to have some small angled boards leftover from a previous project that I made the wrong angled cuts on. I saved those wrong angled boards and was able to use them here!

I grabbed my trusty clamp and began attaching!

Here is another great picture of the pallet from behind. I have the shelves leaning back slightly so any water can easily run off and not accumulate.

After I finished here, I then grabbed some paint and gave this pallet some “pretty”. The color is actually a small sample bottle I had on hand called Appletini by Valspar.

After I painted my pallet, I went back and gathered those beautiful herbs I selected at The Home Depot Garden Center. I could tell that they were also excited to have a new home besides my front patio.
I grabbed my new garden hand tools I picked up at the Garden Center of Home Depot and put my pretty herbs in their pots. The neat thing is they have a wrapping you keep on them and it disintegrates over time. As I placed them into the new herb garden pallet, something just didn’t look “finished” to me.

I decided I needed to dress things up a bit, so I grabbed my computer, cranked up the Silhouette cutting machine, and created some labels on vinyl.
I then attached the vinyl labels to my pallet.

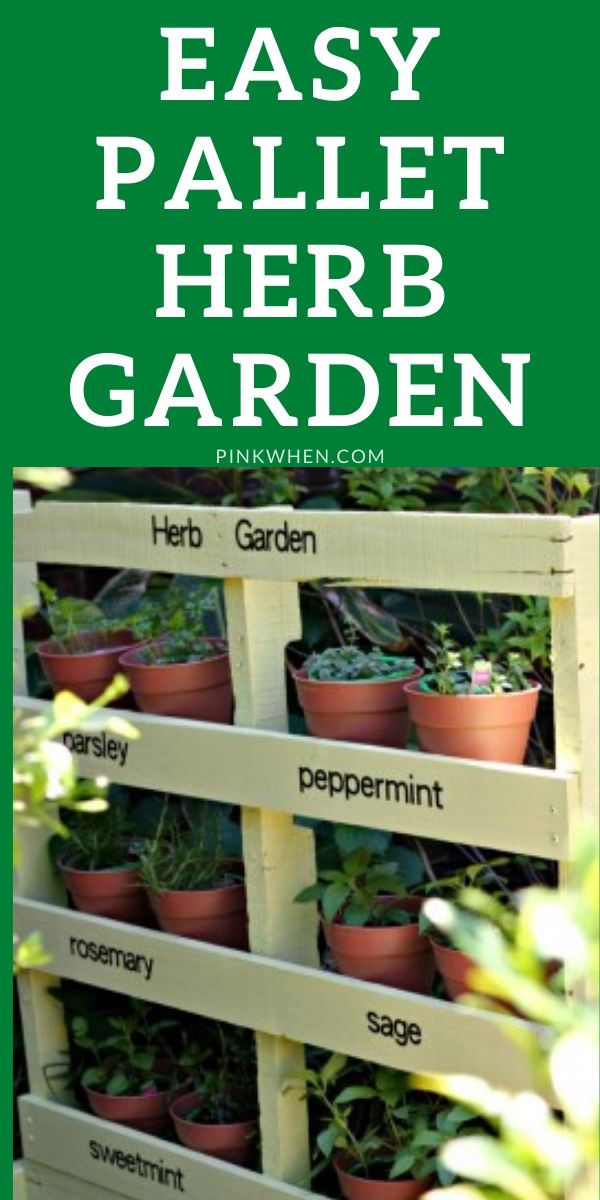
Now she looks pretty! I think the labels added a nice little touch. Here it is all finished!

I am so excited to finally have my very own herb garden, and I feel good about upcycling that poor pallet into such a pretty piece. What a perfect post for today, it is Earth Day after all.
We love to cook around here, so I can imagine I will be making an additional garden pallet to add some peppers into. What do you think?

It’s definitely a big change from that plain pallet, and I know we will get a lot of use out of our new herb garden.



I seriously love this! I saw this on Pinterest and navigated my way to your website. I went out and go two pallets just to make this project with. I want to do two extensive herbs, and maybe even some tea leaves! Thank you for this project!!
That’s awesome! I can’t wait to see how they turn out, make sure to let me know. 🙂
Hi,
I am a little confused by the part with the jig and “pocket holes”. Can you please explain that with simpler terms or a diagram for someone who is not handy (yet)?
Hi Diana, a Kreg Jig is used to make the pocket holes. If you have never used a Kreg Jig before to make pocket holes, I would practice on a couple of scraps. That’s how I started when I first used a Kreg. You can find videos on YouTube on how to make pocket holes with a Kreg Jig, it would be easier than a diagram. 🙂 Hope that helps!
How do you get around the fact that stealing pallets is illegal? I am anxious to make a pallet garden, but where do I get a pallet legally?
I wouldn’t TRY to get around the fact that stealing pallets is illegal, I received my pallet when I had re-sod our back yard. If you can’t find anyone who would give you a pallet, you can always go online and order one. Hope that helps!
I work at Home Depot. If you go to the Lumber dept, and ask them for an old pallet and tell them what your using it for they will give it to you. There is nothing illegal at all. They throw many of them in the trash!
That’s awesome! But that also might be area specific. I have asked a local one here in Shreveport and they always say they are not allowed to give away their pallets.
what size screws were used to put this together?
I used 2 1/2″ screws (Kreg brand)
This is really freaking awesome! Thank you!
MANY places have pallets that they give away….many many many many…especially at Tractor supply sales, 4 wheeler sales places…LOTS of places are HAPPY to give away pallets.. no need to even think about stealing or paying on internet
Great idea that would be excellent on our patio.
What an adorable herb garden display! I actually have a pallet lingering around and had to ideas of my own to turn it into something fun… well, you just gave me a great idea! thanks a bunch 🙂
When I get back home, I’m going to try it.
Thanks
Where did you get your Kreg? I have seen the infomercial and planned to order. Glad to know a “real person” has and uses this, and that it does what they claim. Love your herb pallet.
Thanks Melle! You can pick one up at your local Home Depot or Lowes, or you can order them online if they do not carry them. I was lucky and both of my local stores carry them, but my friend in Colorado has a local Home Depot that did not carry them. I would check first, and then just order online if they don’t have them 🙂
I think that herb garden is so neat
Thank you 🙂
Love your pallet garden… can you please tell me what size pots you used? they look rather large for the thin shelf they seem to be sitting on. Did you consider putting another board across the back as well, creating a small pocket your pots Would fit Into? I have seen that on other versions of this item probably using 3 inch pots. Thanks for sharing it.
I didn’t put a board across the back because I was planning on having it up against a wall. If it was free standing our in the open, I would have probably done that.
Ok, makes sense…and what size pots did you use?
Thanks!
I am not exactly sure, but I would guess they are indeed 3 inch pots. 🙂
Did you use a 3 or a 4 foot pallet?
It was a 4ft pallet I believe. However, if you look at the entire post, I did re-do the entire pallet because of the bad shape it was in.
I think It turned out Adorable. The paint color I really like & the Red Clay Pots & Black writing is Just a Little Masterpiece I’d be very Proud of & I’m sure you Are!! I’ve been wantIing one of these myself. VERY CUTE!!!