• Start Here
    • Work With Me
  • Recipe Index
    • Slow Cooker Meals
    • Instant Pot Recipes
    • Air Fryer Recipes
    • Soups & Chilis
    • Desserts
    • Ingredients
      • Beef
      • Chicken
      • Pork
      • Seafood
      • Vegetables
    • Meals
      • Appetizers
      • Breakfast
      • Desserts
      • Dinner
      • Lunch
      • Side Dish
    • Popular
      • 30 Minute Meals
      • Casseroles
      • Instant Pot Recipes
      • Air Fryer Recipes
      • Simple Fit Forty
      • Slow Cooker Meals
      • Soups & Chili
  • 30 Minute Meals
  • Weekly Meal Plan
  • Crafts & DIY
    • How to Use Essential Oils
    • Essential Oil Uses
    • Silhouette Crafts
    • DIY Furniture
    • Knitting and Sewing Projects
    • DIY Gift Ideas
    • Free Printables
    • Holiday Crafts
    • No Sew Projects
  • Nav Social Menu

    • Facebook
    • Instagram
    • Pinterest
    • Twitter
    • YouTube
Header logo for homepage

PinkWhen

Easy Recipes for Everyone

DIY Spring Scarf Tutorial

Home » Crafts & DIY » Scarves » DIY Spring Scarf Tutorial

Published April 23, 2014 by Jennifer. 14 Comments.
This post may contain affiliate links. Your cost is the same but it helps support this site and the fun freebies we share. See our full disclosures here.

Share
Pin
Share
Share

I love making my own fun Spring Scarves. This past year I purchased a TON of Knit Jersey fabric to make a few Maxi Skirts and Dresses. When I made all that I wanted, I had several yards of fabric leftover. What to do? Well, seeing that I love scarves as much as I do, it was a bit of a “no-brainer” for me. Here is a fun, quick, and easy DIY Spring Scarf Tutorial that is very beginner.

You won’t need a lot of material or a lot of time to make this fun Spring Scarf. It literally goes by so fast you can make a ton of these in an hour! (Well, not a TON, that would be a lot…but I bet you could make 10!)
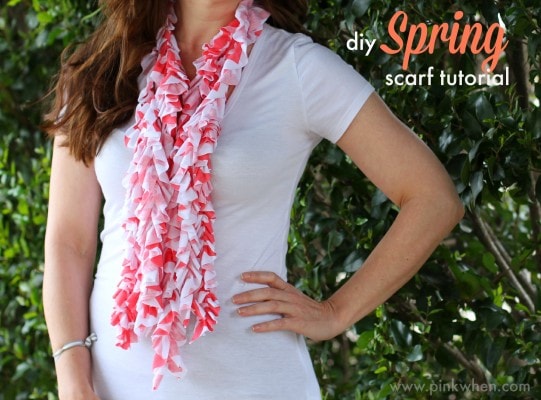
diy Spring Scarf Tutorial via PinkWhen.com


Easy DIY Spring Scarf Tutorial

Here is what you will need for this quick tutorial:
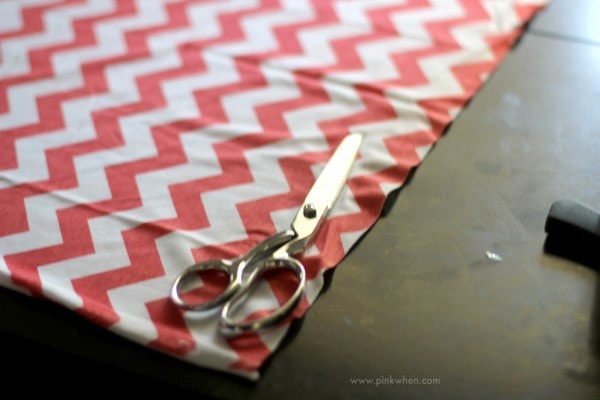
diy Spring Scarf supplies

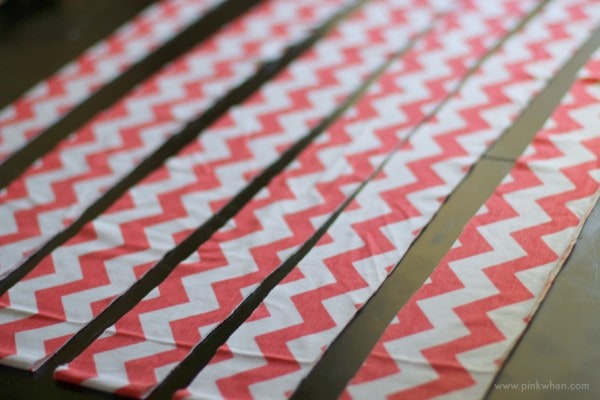
  • 60″ x 18″ of fabric (cut this into 6 even strips of 60″ x 3″)
  • sewing machine and supplies

diy Spring Scarf Tutorial supplies

Step 1:  Take your 6 strips and turn them into 3! Do this by adding 1 strip by joining the ends together. This should give you 3 LONG strips that are about 120″ x 3″

Step 2: Set your sewing machine up to ruffle these babies up! I had my setting at 4.0mm W 3.0mm L and 9.0mm T.
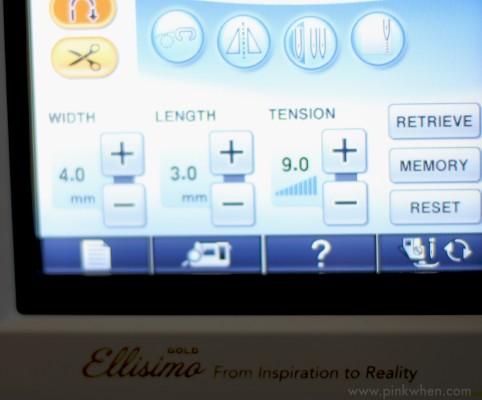
diy Spring Scarf Tutorial settings

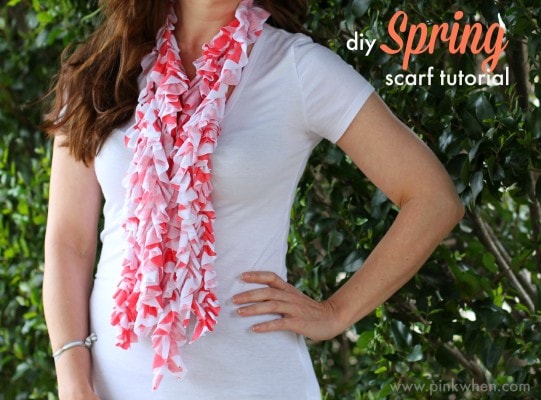
Step 3: Once you have finished all 3, add them together and let them hang, or add a cute little flower or button to clasp them together. I like the look of letting them hang, myself!
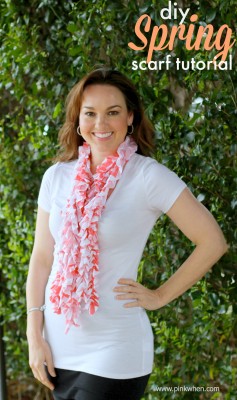
diy Spring Scarf Tutorial

That’s all! A very quick and simple DIY Spring Scarf Tutorial that is a perfect beginner sewing project to tackle. What are some of your favorite sewing projects?

If you enjoyed this project, you might also like:
  • Arm Knitting for Beginners
  • DIY Ruffle Scarf
  • How to crochet a scarf with a loom 

diy Spring Scarf Tutorial via PinkWhen.com

Share
Pin
Share
Share

April 23, 2014 · 14 Comments

MORE FROM PINKWHEN!

DIY Crochet Scarf & Pom Poms
DIY Crochet Scarf with Pom Poms
DIY Ruffle Scarf that takes less that 5 minutes! Simple Tutorial.
DIY Ruffle Scarf
Pretty Red Crocheted Scarf With Loom
DIY Scarf Week

ABOUT JENNIFER

about me

Do you feel like there is not enough time in the day? I'm with you. Hi! I'm Jen, a wife, mother, and tennis lover who likes to share all of my quick easy recipes, crafts, and more. You can find anything from delicious 30-minute dinners or scrumptious dessert recipes the whole family will love. Read more...

Previous Post: « Daily/Weekly Blogging Schedule {Free Printable}
Next Post: Frozen Chocolate S’mores Ice Cream Pie »

Reader Interactions

Comments

  1. Tamara says

    April 23, 2014 at 11:27

    That’s so awesome! And it made me happy to go back and look at your maxi skirts/dresses post.
    You are definitely the best dressed person in the world.

    Reply
  2. Belinda says

    April 23, 2014 at 21:17

    Did you run the ruffle stitch down the middle or on the edge of the strips? Luv them!

    Reply
    • Jennifer says

      April 24, 2014 at 06:48

      I ran the ruffle stitch right down the middle.

      Reply
  3. Kimberlee says

    April 24, 2014 at 22:28

    I love this – so easy and cute. I have lots of leftover jersey fabric since I sew a lot with knits. Thanks for sharing this – pinning.

    Reply
  4. Kristina & Millie says

    April 28, 2014 at 21:14

    Totally adorable! I could see getting 10 of these out in a couple hours lol I am a slow sewer!

    Reply
  5. Beth says

    April 29, 2014 at 14:43

    Love this scarf; but what do you do if your machine doesn’t have a ruffler?

    Reply
    • Jennifer says

      April 29, 2014 at 16:09

      Check out the post, I didn’t use a ruffler….I am not that talented 🙂 I just increased the length and tension. The numbers are in the post!

      Reply
  6. Bonnie @ The Pin Junkie says

    May 1, 2014 at 19:43

    Thanks for sharing this cute spring scarf tutorial at The Pin Junkie. It’s being featuring at this week’s party. Hope you’ll stop by to party again with us this week!

    Reply
    • Jennifer says

      May 2, 2014 at 09:03

      Thanks Bonnie!

      Reply
  7. Emily says

    May 3, 2014 at 09:51

    I love the colors and the style, perfect for spring! Thanks for linking up to Create LInk Inspire, you are featured today! I’ve spread the word all over my social media and tagged you where possible! WOuld love a reshare or the like ;o) Happy Weekend. Emily

    Reply
  8. PIppa says

    August 6, 2014 at 16:27

    I don’t have a “ruffler” – it would be great to have a close up photo of how you sewed the lengths – that’s the difficult bit! You have a pic of the cut strips – that’s the easy bit!!!!

    Reply
    • Jennifer says

      August 6, 2014 at 20:47

      I don’t have a ruffler either! I just cranked up the tension…check out the post and read how I ruffled the fabric 🙂

      Reply

Leave a Reply Cancel reply

Your email address will not be published. Required fields are marked *

Recipe Rating


This site uses Akismet to reduce spam. Learn how your comment data is processed.

Primary Sidebar

Welcome!

about holly

Do you feel like there is not enough time in the day? I'm with you. Hi! I'm Jen, a wife, mother, and tennis lover who likes to share all of my quick easy recipes. Wondering why my site is called PinkWhen? Click in the top left corner START HERE to read more about it!

  • Facebook
  • Instagram
  • Pinterest
  • Twitter
  • YouTube

Search

Popular Posts

  • Cinnamon Rolls Made in the Air Fryer
    Easy Air Fryer Cinnamon Rolls
  • Crescent dogs in an Air Fryer basket and on a white plate.
    Air Fryer Pigs In A Blanket
  • Slice of cheeseburger pie on a white plate with a fork
    Cheeseburger Pie
  • Slow Cooker Salisbury Steak in the liner of a Crock pot.
    How to Make Slow Cooker Salisbury Steak
  • Start Here
  • Recipe Index
  • 30 Minute Meals
  • Weekly Meal Plan
  • Crafts & DIY

Footer

Popular

Homemade Lavender Lotion Bars

How to Make Homemade Lavender Lotion Bars

Tic Tac Toe Backyard Bean Bag Toss

Tic Tac Toe Backyard Bean Bag Toss

Glass Vase Makeover

Featured

Cinnamon Rolls Made in the Air Fryer

Easy Air Fryer Cinnamon Rolls

Crescent dogs in an Air Fryer basket and on a white plate.

Air Fryer Pigs In A Blanket

Slice of cheeseburger pie on a white plate with a fork

Cheeseburger Pie

Latest

Slow Cooker Salisbury Steak in the liner of a Crock pot.

How to Make Slow Cooker Salisbury Steak

Corn dogs in a single layer in an Air Fryer basket.

Air Fryer Corn Dogs

Taco casserole made with chicken covered with sour cream and green onion tops and ready to serve.

Chicken Taco Casserole

Copyright © 2021 pinkwhen.com. All rights reserved. Privacy Policy. Cookie Policy.